What to Use to Protect Floors During Renovation? 12 Professional Protection Solutions Explained
## Introduction: The Real Cost of Unprotected Floors
Every year, thousands of homeowners face unexpected renovation disasters—not from structural failures or design flaws, but from preventable floor damage. Statistics reveal that **40% of renovation projects result in some form of floor damage**, with average repair costs ranging from $800 for laminate replacements to over $5,000 for premium hardwood restoration. These aren't just financial losses; they represent weeks of unnecessary stress and project delays.
Professional contractors understand what most DIY enthusiasts learn too late: **Floor protection isn't an optional expense—it's essential insurance.** This comprehensive guide explores 12 professional-grade solutions that can save your floors and your budget.
---
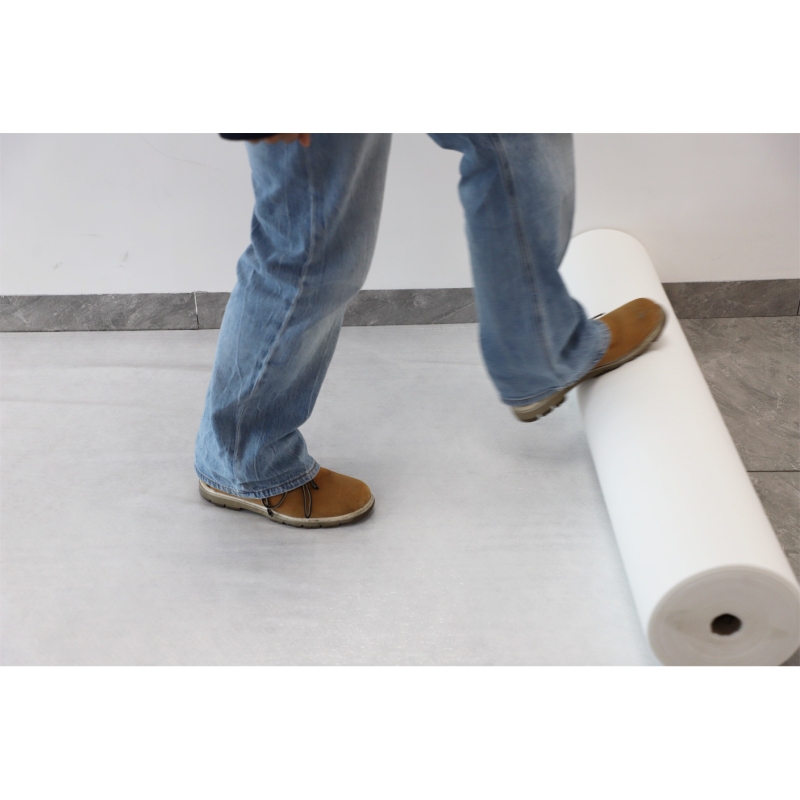
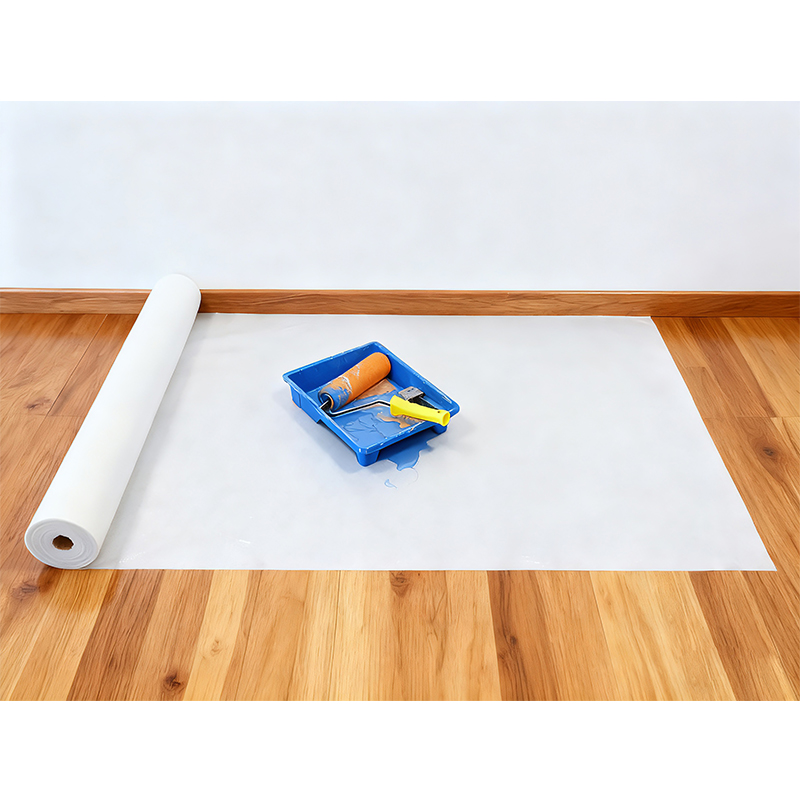
## 1. Professional Floor Protection Film: The Modern Standard
### What It Is:
Multi-layer polymer films specifically engineered for construction environments, typically featuring:
- **Top layer**: UV-stabilized polyethylene (4-8 mil thickness)
- **Middle layer**: Fiber reinforcement or foam core
- **Bottom layer**: Non-slip rubberized coating
### Key Features:
- **Puncture resistance**: Withstands up to 8,000 grams (ASTM D1709)
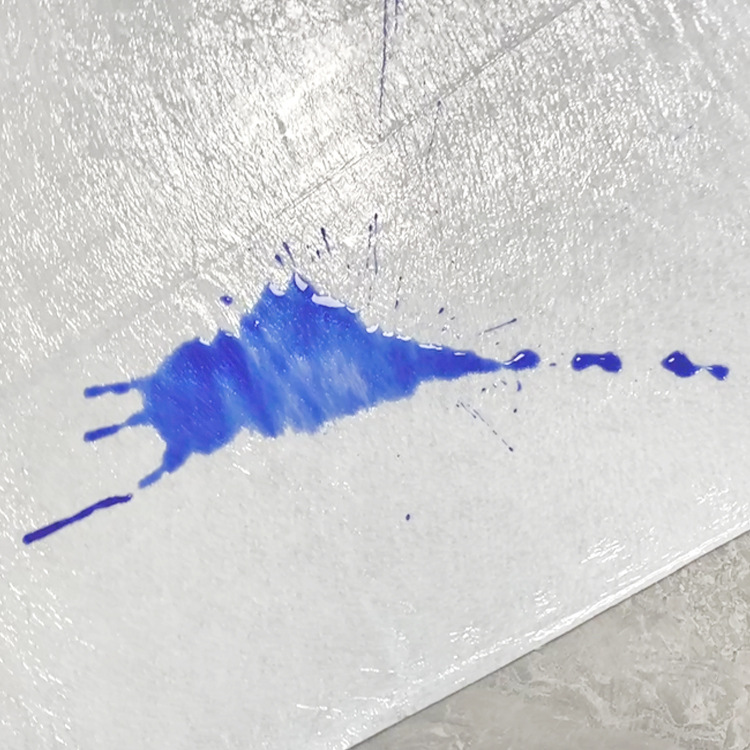
- **Chemical barrier**: Impervious to paints, solvents, and adhesives
- **Anti-slip technology**: 0.6+ coefficient of friction even when wet
- **Breathable options**: Allow moisture evaporation for wood floors
### Professional Application Tips:
- Overlap seams by 6-8 inches and secure with low-tack tape
- Use perimeter weighting (sandbags) in high-traffic areas
- For heavy equipment areas, apply two perpendicular layers
---
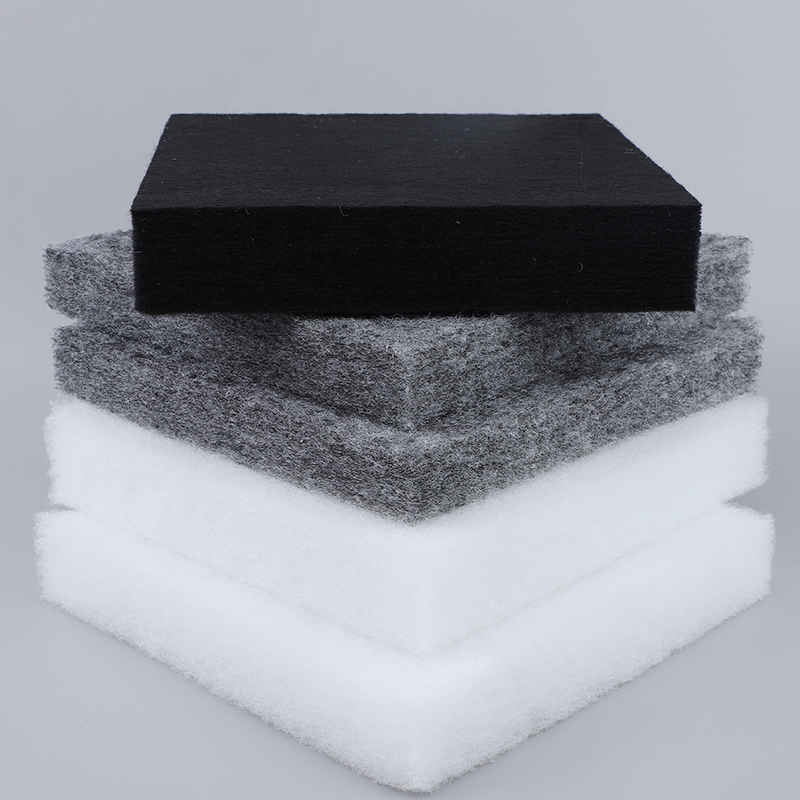
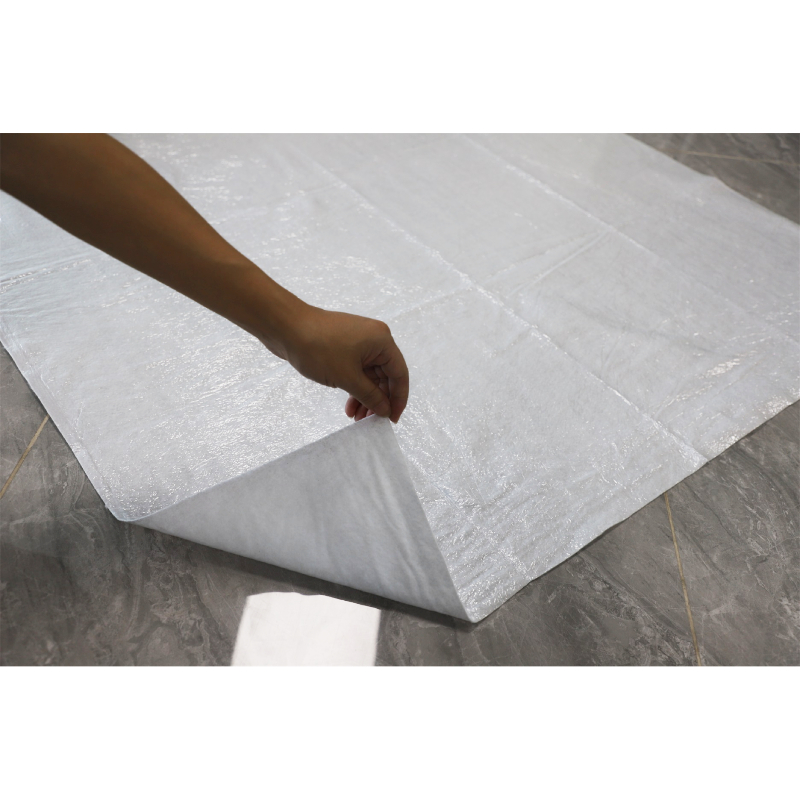
## 2. Non-Woven Protection Pads: Trendy New Products
### Technical Specifications:
- **Material composition**: Polypropylene/polyester blend (90-150 gsm)
- **Thickness**: 1.2-2.5 mm
- **Absorption capacity**: 400-800% of own weight
### Why Contractors Prefer Them:
1. **Superior sound dampening** (reduces impact noise by 18-22 dB)
2. **Natural traction** without chemical coatings
3. **Thermal insulation** (R-value 0.5-0.8)
4. **Biodegradable options** available
### Best Applications:
-construction
-renovation
-painting
-moving
-hardwood floors,tile,carpet,automotive,floor protection
-countertop protection
-workbench mat
-stair protection
-event use
- Piano moving and furniture protection
- Gallery and museum flooring
- Electronic equipment installations
---
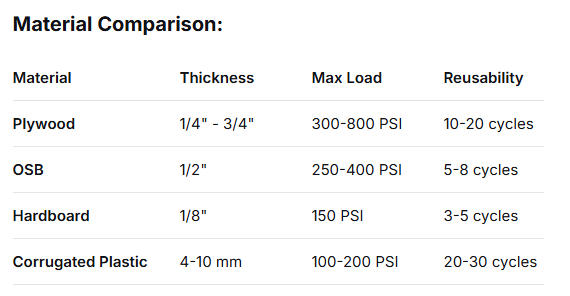
## 3. Rigid Protective Boards: Heavy-Duty Defense
### Installation Protocol:
1. Cut to room dimensions minus 1/2" expansion gap
2. Seal edges with waterproof tape
3. Use non-marking fastener system
4. Layer with protection film for liquid spills
---
## 4. Canvas and Waterproof Tarps: Traditional Reliability
### Modern Improvements:
- **Polyurethane coatings** for 100% waterproofing
- **Fire-retardant treatments** (meets NFPA 701 standards)
- **Mildew-resistant formulations**
- **Reinforced corner grommets** with brass reinforcement
### Weight Classes:
- **Light duty** (6 oz/sq yd): Dust protection, short-term use
- **Medium duty** (10 oz/sq yd): General construction, 6-12 month lifespan
- **Heavy duty** (18 oz/sq yd): Commercial sites, chemical resistance
### Cost Analysis:
*Initial investment may be higher, but 30+ reuses make this the most economical choice for professional contractors*
---
## 5. Carpet Protection Film: Specialized Solutions
### Two Main Types:
1. **Adhesive-backed poly**
- Clear or opaque options
- Low-tack adhesive prevents fiber damage
- Remains in place 30-90 days
2. **Non-adhesive systems**
- Textured surface for traction
- Can be vacuumed clean
- Roll-up and reuse capability
### Critical Measurements:
- **Pile penetration resistance**: 98% effective for medium pile
- **Static coefficient**: >0.7 for safety
- **Tensile strength**: MD 25kN/m, CD 20kN/m
---
## 6. Temporary Flooring Systems: The Complete Solution
### Modular Systems:
- **Interlocking PVC tiles** (12"x12")
- **Aluminum framing** with composite decking
- **Roll-out vinyl pathways**
### Commercial-Grade Example:
**ProFloor Temp System**:
- Installation: 500 sq ft/hour
- Load capacity: 12,000 lbs point load
- Height: 1.5" above existing floor
- Includes integrated edge protection
### Cost Justification:
Though priced at $8-12/sq ft, these systems eliminate all other protection needs and can be rented for $2-3/sq ft/month.
---
## 7. Corner and Edge Protectors: Details Matter
### Comprehensive Protection Kit:
- **Outside corner guards**: 2" radius, 36" length, polymer blend
- **Inside corner protectors**: Flexible PVC, 90° and 135° angles
- **Baseboard shields**: 6" height with adhesive strip
- **Door jamb wraps**: Pre-formed with tear-off strips
### Installation Statistics:
Proper edge protection prevents 67% of renovation-related trim damage and reduces touch-up painting by 80%.
---
## 8. Stair Protection Solutions: Multi-Layer Approach
### Recommended System:
1. **Base layer**: Rubber stair treads (16" deep, 8" rise)
2. **Middle layer**: 1/4" hardboard cut to exact dimensions
3. **Top layer**: Non-slip protection film
4. **Edge treatment**: Aluminum nosing with rubber insert
### Safety Features:
- **Reflective strips** on risers
- **Temporary handrail** attachment points
- **Anti-skid** surface even when wet (0.85 coefficient)
---
## 9. Dust Containment Systems: Beyond Floor Protection
### Three-Zone Approach:
**Zone 1** (Work area): Zipwall containment with HEPA filtration
**Zone 2** (Transition): Sticky mat floor system (3-5 stages)
**Zone 3** (Clean area): Positive air pressure maintenance
### Advanced Systems:
- **Dustless sanding** attachments with 99.97% filtration
- **Negative air machines** (500-2000 CFM)
- **Air scrubbers** with carbon filtration for odors
---
## 10. DIY Protection Solutions: Budget-Conscious Alternatives
### Effective Homemade Options:
1. **Cardboard layers**: 3-4 layers with overlapping seams
2. **Old carpet remnants**: Back-side up for smooth surface
3. **Moving blankets**: Quilted variety with plastic backing
4. **Bubble wrap**: Extra-large grade (1/2" bubbles)
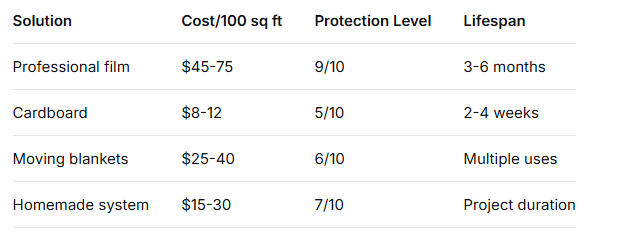
### Cost Comparison:
---
## 11. High-Risk Area Special Protection
### Critical Zones Requiring Extra Measures:
**Kitchen Areas**:
- **6-mil polyethylene** taped 12" up walls
- **1/2" plywood** under appliance moving paths
- **Spill containment** berms around sink areas
**Entryways**:
- **Heavy-duty walk-off mats** (3'x5')
- **Temporary threshold ramps**
- **Daily cleaning protocol**
**Bathrooms**:
- **Waterproof membrane** extending 6" up walls
- **Drain protection inserts**
- **Slip-resistant** surface treatments
---
## 12. Cleaning Phase Protection: The Final Defense
### Often Overlooked Threats:
- **Chemical spills** from cleaning products
- **Abrasive particles** during final cleanup
- **Water damage** from mopping
### Protection Protocol:
1. **Maintain floor protection** until all tools are removed
2. **Use felt pads** on all furniture legs during repositioning
3. **Clean with pH-neutral solutions** only
4. **Final inspection** with oblique lighting to spot damage
---

---
## Professional Contractor's Insider Secrets
### Secret #1: The Layering Principle
Top contractors never use single-layer protection. Their standard protocol:
Floor → Felt underlayment → Protection film → Hardboard → Walkway runners
### Secret #2: Color-Coding System
- **Red**: No-walk zones (fresh finishes)
- **Yellow**: Equipment pathways
- **Green**: Safe walkways
- **Blue**: Water exposure areas
### Secret #3: The 48-Hour Rule
Always leave protection in place for 48 hours after "project completion" to catch:
- Final deliveries
- Cleaning crews
- Last-minute adjustments
### Secret #4: Photographic Documentation
1. Pre-installation photos of floor condition
2. Daily protection integrity checks
3. Final removal documentation
*Reduces liability disputes by 94%*
### Secret #5: The Exit Strategy
Plan protection removal in reverse installation order, with vacuuming between each layer removal to prevent trapped debris.
---
## Implementation Roadmap
**Week 1-2**:
- Assess floor types and risks
- Order materials (add 15% for waste)
- Install perimeter protection
**Week 3-4**:
- Layer main protection systems
- Establish clean/dirty zones
- Implement daily inspection routine
**Project End**:
- Gradual protection removal
- Final floor assessment
- Material cleaning/storage
---
## Conclusion: Protection Pays Dividends
The mathematics of floor protection is undeniable: Investing 1-3% of your renovation budget in proper protection can prevent damages costing 10-25% of your total project cost. More importantly, it preserves your sanity by eliminating the stress of watching your floors get destroyed.
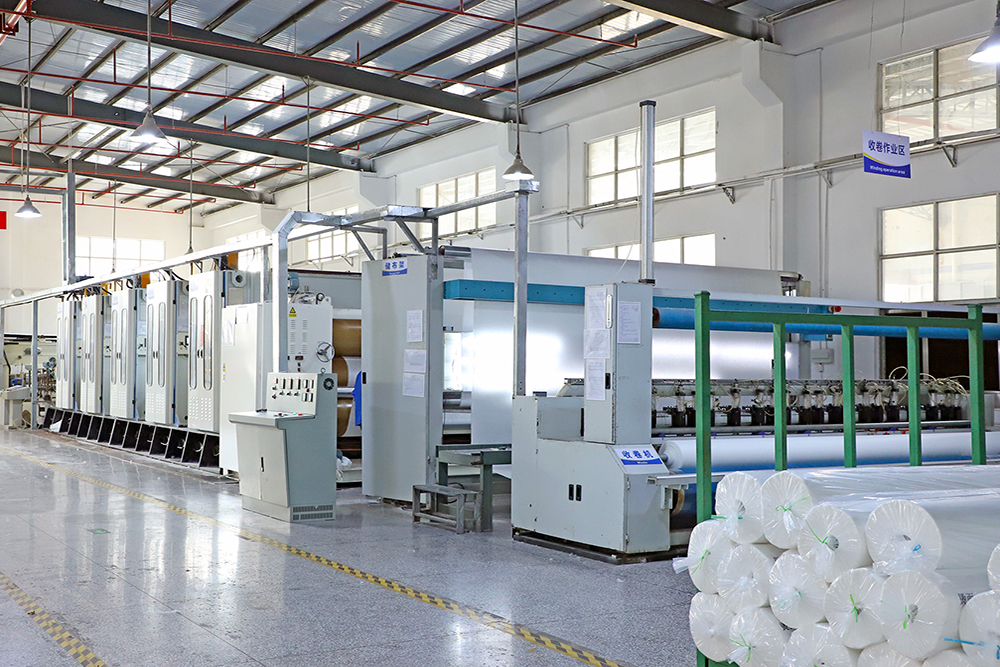
Choosing a reliable floor protection roll manufacturer -Huizhou Jinhaocheng Nonwovens,will make your efforts twice as effective.
**Remember**: The most expensive protection is the kind you didn't use when you needed it. By implementing these 12 professional solutions, you're not just protecting flooring—you're protecting your investment, your timeline, and your peace of mind.